You’re standing at the edge of a cliff in Santorini, watching the sun melt into the Aegean Sea. Or maybe you’re sipping street-side coffee in Hanoi, steam curling from your cup as motorbikes whiz past. In that moment, you grab your phone, snap a quick photo—and later, when you look back, it’s flat, cluttered, or just… ordinary. The magic is gone.
Here’s the truth: you don’t need a fancy camera to take stunning travel photos. Today’s smartphones—whether iPhone, Samsung Galaxy, or Google Pixel—are powerful enough to capture professional-looking images. What’s missing isn’t gear. It’s technique, intention, and a few simple habits that turn snapshots into stories.
In this guide, you’ll learn practical, easy-to-apply tips to take breathtaking travel photos using only your phone. We’ll cover how to use natural light like a pro, compose shots that draw viewers in, edit without overdoing it, and capture the soul of a place—not just its postcard view. You’ll also discover how to photograph people respectfully, avoid common mistakes, and organize your photos so you can actually find them later.
Whether you’re on a solo backpacking trip or a family beach vacation, these strategies will help you document your journey in a way that feels authentic, beautiful, and deeply personal.
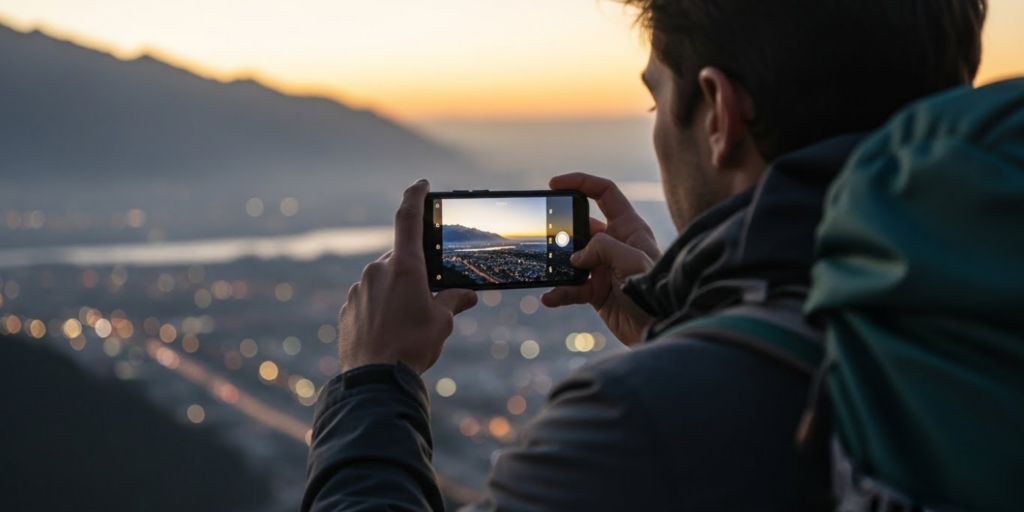
Your Phone Is Already a Powerful Camera—Use It Right

Let’s start by busting a myth: great travel photos aren’t about megapixels—they’re about moments. Modern smartphones use computational photography to blend multiple exposures, enhance dynamic range, and reduce noise—often outperforming older DSLRs in everyday lighting.
But to unlock that power, stop using your phone like a point-and-shoot. Instead:
- Clean your lens. Smudges cause haze and glare—wipe it with your shirt or a microfiber cloth.
- Use the rear camera. It’s higher quality than the front-facing one (even for selfies—just flip the image later).
- Tap to focus and adjust exposure. On most phones, tap your subject on-screen, then slide the sun icon up or down to brighten or darken.
- Turn off flash. It flattens scenes and kills ambiance. Rely on natural light instead.
Most importantly: hold your phone steady. Use both hands, tuck your elbows in, or lean against a wall. Better yet, use burst mode (hold the shutter button) to capture motion—then pick the sharpest frame later.
Your phone is always with you. That’s your superpower. Use it to capture life as it happens—not just the posed moments.
Master Natural Light: The Secret to Vibrant, Emotional Photos
Light is the soul of photography. And the best part? The most beautiful light is free—and predictable.
Shoot during “golden hour”—the hour after sunrise and before sunset. The sun is low, casting soft, warm, directional light that adds depth, texture, and mood. Shadows are long but gentle. Colors glow. This is when even simple scenes look cinematic.
Avoid harsh midday sun. It creates unflattering shadows, blown-out skies, and squinting subjects. If you must shoot then:
- Find open shade (under a tree, awning, or archway)
- Use reflective surfaces (white walls, water, sand) to bounce soft light onto your subject
- Shoot silhouettes against bright skies for dramatic effect
Cloudy days are your friend. Overcast skies act like a giant softbox, diffusing light evenly—perfect for portraits, markets, or detailed shots of food and architecture.
Pro tip: Enable HDR mode (High Dynamic Range) in your camera settings. It captures multiple exposures in one shot, preserving detail in both bright skies and dark shadows—ideal for beach scenes or mountain vistas.
Composition: Simple Rules That Make a Huge Difference
You don’t need to be an artist to compose compelling photos. Just remember these three beginner-friendly techniques:
1. The Rule of Thirds
Imagine your screen divided into a 3×3 grid. Place your subject along one of the lines or at an intersection point. This creates balance and visual interest. Most phones have a grid overlay in settings—turn it on.
2. Leading Lines
Use roads, railings, shorelines, or rows of lanterns to guide the viewer’s eye into the photo. This adds depth and draws attention to your focal point.
3. Negative Space
Leave empty space (sky, water, a blank wall) around your subject. This creates minimalist, calming compositions that let your subject breathe.
Also try:
- Shoot from unusual angles: Get low for dramatic scale, or shoot from above for patterns (like a breakfast spread or tiled rooftops).
- Frame within a frame: Shoot through windows, doorways, or tree branches to add layers and context.
- Capture details: Focus on textures—wrinkled hands selling fruit, peeling paint on a door, raindrops on a leaf. These reveal the soul of a place without showing its name.
As photographer Elliott Erwitt said: “To me, photography is an art of observation. It’s about finding something interesting in an ordinary place.”
Tell a Story—Not Just a Landmark
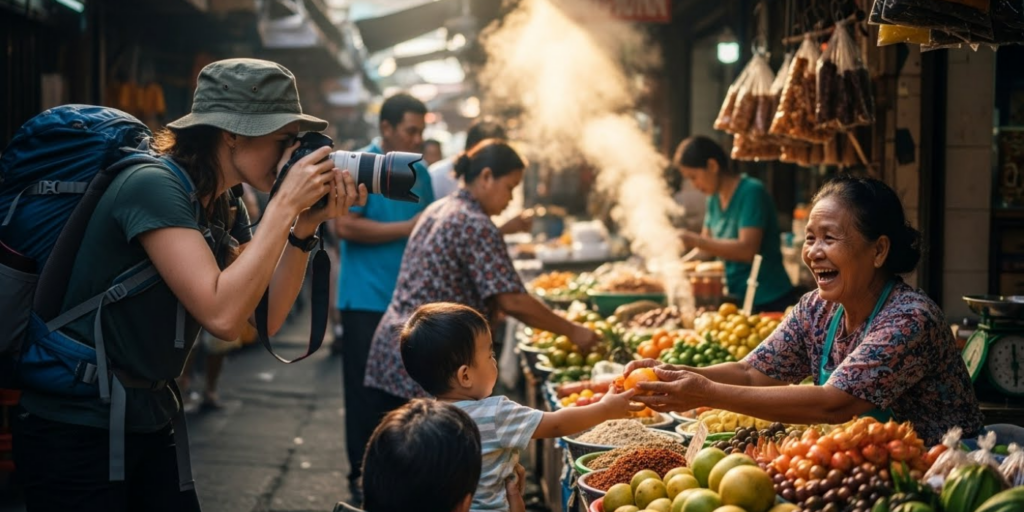
The most memorable travel photos aren’t just pretty—they’re emotional. They make you feel something: wonder, nostalgia, joy.
To create that impact, show life, not just locations. Capture:
- Local interactions: A baker pulling bread from an oven, kids playing in a fountain
- Your hands in the scene: Holding a map, stirring coffee, touching ancient stone
- Unexpected moments: Laundry drying between buildings, a cat napping in a sunbeam, steam rising from a street food cart
Avoid “checklist tourism” photos—you know the ones: stiff pose in front of the Eiffel Tower, back to the camera, no context. Instead, show how you experience the place.
Example:
- ❌ Standard: You standing in front of Machu Picchu
- ✅ Storytelling: Your hiking boots on a stone path, with mist swirling over the ruins in the background
Pro Tip: Take a “visual diary” series—morning coffee, a local market, an evening stroll. Together, they tell a richer story than any single post.
Editing: Enhance, Don’t Overdo It
Editing is where good photos become great—but less is more. The goal isn’t to make your photo look fake, but to bring out what was already there.
Best Free Apps:
- Snapseed (by Google): Offers precise control over lighting, color, and focus
- VSCO: Great film-inspired presets with subtle tones
- Adobe Lightroom Mobile: Professional-grade tools, free for basic use
Simple Editing Workflow:
- Crop & straighten (use the grid!)
- Adjust exposure (brighten shadows, tone down highlights)
- Boost clarity or texture slightly (adds crispness without harshness)
- Tweak white balance if colors look too cool or warm
- Avoid heavy filters that oversaturate or add unnatural vignettes
Golden Rule: If someone says, “Wow, great editing!”—you’ve probably gone too far. The best edits feel invisible.
Also, save your original photo before editing. You can always revisit it later with fresh eyes.
Bonus Tips: People, Privacy, and Practical Habits
Photographing people respectfully:
- Always ask permission before photographing strangers, especially in rural or sacred spaces. A smile and gesture go a long way—even without shared language.
- If someone says no, respect it immediately.
- Consider giving back: share the photo via email or print a copy to mail later.
Organize your photos:
- Create albums by trip (“Kyoto 2025,” “Costa Rica Adventure”)
- Use Google Photos’ “Assistant” to auto-create collages or movies
- Back up to cloud storage weekly—so you never lose memories to a cracked screen
Protect your phone:
- Use a waterproof pouch at beaches or waterfalls
- Carry a portable charger—dead battery = missed moments
And remember: put your phone down sometimes. The best memories aren’t captured—they’re lived.
Conclusion: Capture the Feeling, Not Just the View
Taking beautiful travel photos on your phone isn’t about chasing likes or perfect symmetry. It’s about honoring your journey—the quiet moments, the fleeting glances, the sensory details that made a place feel alive to you.
With these tips—mastering light, composing with purpose, editing gently, and shooting with heart—you’ll create images that do more than document. They’ll transport you back. They’ll make your friends say, “I felt like I was there.” And years from now, they’ll remind you not just where you went, but how it felt to be there.
So next time you travel, don’t just snap and scroll. Pause. Breathe. Frame the moment with care.
What’s your favorite travel photo you’ve taken on your phone—and what made it special? Share your story or a tip in the comments below! We’d love to see the world through your lens.

Michael Thompson is an enthusiast of travel, restaurants, financial freedom, and personal performance. He enjoys discovering new destinations and exploring local cuisine while constantly working on self-improvement and independence. For Michael, life is about creating meaningful experiences, growing every day, and building a lifestyle that combines freedom, discipline, and curiosity.